Thursday, November 26, 2020

Azure AD Sync - Set-MsolDirSyncEnabled : You cannot turn off Active Directory synchronization.

 I recently ran into a situation in my lab environment that required I resync all (2000+) user accounts to Azure AD. Though this sounds complex and daunting, its actually quite simple. T


he basic steps involve disabling sync, and then removing the user objects. This can all be done with two PowerShell commands:

1) Set-MsolDirSyncEnabled -EnableDirSync $false


2) Get-MsolUser -All | Remove-MsolUser -force


The account that you are currently running the commands as will not be removed. 

To enable Azure AD Sync, you simply reverse the boolean operation on the Set-MsolDirSyncEnabled cmdlet above. However, I ran into an issue when trying to enable Azure AD Sync. 


After some research, it turns out you must wait a period of time (up to 12 hours in some cases) before you can make a second change to the Azure AD Sync status. This error simply means that we made a recent change to Azure AD Sync, and we must wait before making another change. To prove this, there is a "DirectorySynchronizationStatus" member for the Get-MsolCompanyInformation cmdlet. If we take a look at this member, we can see the status is "PendingDisabled". 


Check the status of this periodically over the next 12 hours or so, and once it says "Enabled" or "Disabled", you should be able to change the state once more. 

Thursday, November 19, 2020

Azure VM Scale Set - Get Instance IP Address


If you are using VM Scale Sets in Azure, you know how important it can be to quickly obtain an instance IP address. This can of course be done using the Azure Portal. However, I am often working in a shell or VSCode, and I do not want to leave the comfort of my shell to login to the portal.

There are a few options we have for retrieving information about a VMSS and its instances without using the Azure Portal. We can use PowerShell or the Azure CLI. Being that I am constantly flipping between Windows and Linux, I will detail both here.


You will need to have the AZ module installed. To install this module, simple open PowerShell (as admin) and type in “Install-Module -Name az”. To get the IP address of the instances within a scale set, use the following script:

https://github.com/rnemeth90/Get-VmssInstanceIpAddress

You can also use the Azure CLI to obtain individual instance IP addresses. This method is much simpler than PowerShell, and only requires one line of code:

az vmss nic list --resource-group myResourceGroup  --vmss-name myVmss | grep -w "privateIpAddress"


Tuesday, November 17, 2020

Azure Policy - Allowed Locations for Resource Deployment


Azure Policy allows us to control what actions users can perform regarding creating and managing resources in Azure. We can define policies for naming standards, require that certain extensions be installed on virtual machines, audit various resources for certain configurations… the possibilities are endless.

In this article, well focus on defining what locations users can deploy resources in. To get started, login to the Azure Portal and search for “Policy”.


Click on “Definitions”. Here you will find several built-in definitions that can be applied to your resources. Definitions are a json template containing the logic for what you want to accomplish. It is worth investing some time to look through these built-in definitions.

In the “search” field, type in “location”. Then, click on the “Allowed Locations” definition.


Here you can see the json content of the definition. The “policyRule” section is the bread and butter of the definition. In this particular example, the policyRule states that if the location that the user is deploying a resource to is NOT a) in the list of allowed locations, b) global, or c) a b2c directory, then deny the deployment.


Next, click on “Assign”.


You can assign the policy to a subscription or resource group. You can also create exclusions in this same window, and enable or disable the policy.

Click “Next”, and on the Parameters page, choose the allowed locations from the drop down menu. Then click next.

Azure Policy has the capability to remediate non-compliant resources. An example would be having a policy that requires anti-virus be installed on all servers. If Azure Policy detected a server that did NOT have anti-virus installed, it would use a managed identity to install AV software on the server. This particular policy does not need a remediation action, so we will just click “Next” here.

On the Review + Create window, review the resource and then click “Create”.

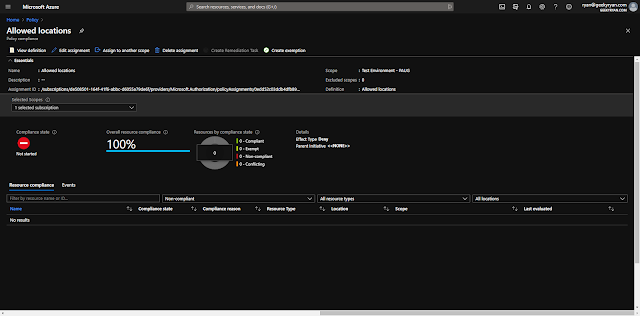
Back on the Azure Policy blade, select “Assignments”. We can now see that our new policy is assigned.


Back on the “Overview” page, you can track compliance for the policy. We can see here that compliance for the “Allowed Locations” policy assignment has not yet been started. This typically takes an hour or so before the compliance state is updated.


Click on the Policy to get a more detailed view of compliance, view the definition, edit the assignment, and even create exemptions.